
In our earlier post on Selenium Grid, we explained an easier method to download and install the Selenium Grid. Also, the post did teach you how to configure multiple browsers like Firefox, Chrome, and IE with Selenium Grid. In today’s tutorial, you’ll get to learn how to run parallel tests with Selenium Grid Webdriver. And since we’ll create a multi-node setup in this post using Grid and Remote Webdriver, which can even help in using Selenium for load testing.
We’ll give you the best approach to speed up test execution using Selenium Grid. We’ll make sure you should be able to set up and test, so we’ll try to keep things simple throughout the post. Also, we’ll provide a fully working Selenium Grid Webdriver code in Java which you can easily run in the Eclipse IDE. If you are a newbie in automation and want to learn Selenium Grid Webdriver, then just go through the step-by-step process of building a Selenium Webdriver project in Eclipse. It’ll help in ramping up quickly.
You would be amazed to know that even companies like Saucelabs and BrowserStack are making use of Selenium for load testing. They are using vast cloud infrastructure and customized Selenium to scale browser automation and load testing. Just imagine that together they are supporting 1000+ browsers and devices for testing using Selenium.
Selenium Grid Webdriver Code Example in Java.
Before we jump to the code section, it’s important for you to understand the use case we’ll cover using the Selenium Grid Webdriver code. In this tutorial, we’ll access a website that does the arithmetic calculations. So, the Selenium Grid Webdriver code will start the three browsers in parallel. Then, it’ll open the web page and process the calculation request at the same time in all three browsers. However, the operation will end up fast. But you would perceive the difference as the Selenium Grid will speed up the tests by running them in parallel.
With Selenium Grid, you not only speed up the test execution but also make it do the cross-browser testing. That’s the way you can ensure the application is running consistently across different browsers. We recommend you adopt this tool in regular practice to ease test execution.
We’ve split up this Selenium Grid tutorial into three parts. Each part has multiple steps so the code should remain easy to grasp.
1- Writing Selenium Grid Webdriver Code using TestNG in Java.
Step-1:
We will develop a test using TestNG. In the following example, we will launch the browsers on nodes using a remote web driver. It can pass on its capabilities to the driver so that the driver has all the information to execute on Nodes.
The code below will read the browser parameter from the <TestNG.xml> file.
Step-1.1: Here is the sample Selenium Grid Webdriver code to run parallel tests.
package seleniumGrid;

import java.net.MalformedURLException;
import java.net.URL;
import java.util.concurrent.TimeUnit;

import org.openqa.selenium.By;
import org.openqa.selenium.WebDriver;
import org.openqa.selenium.remote.DesiredCapabilities;
import org.openqa.selenium.remote.RemoteWebDriver;
import org.testng.annotations.AfterTest;
import org.testng.annotations.BeforeTest;
import org.testng.annotations.Parameters;
import org.testng.annotations.Test;

public class TestGridClass {
	public WebDriver driver;
	public String URL, Node;
	protected ThreadLocal<RemoteWebDriver> threadDriver = null;

	@Parameters("browser")
	@BeforeTest
	public void launchbrowser(String browser) throws MalformedURLException {
		String URL = "http://www.calculator.net";

		if (browser.equalsIgnoreCase("firefox")) {
			System.out.println(" Executing on FireFox");
			String Node = "http://192.168.1.3:5566/wd/hub";
			DesiredCapabilities cap = DesiredCapabilities.firefox();
			cap.setBrowserName("firefox");

			driver = new RemoteWebDriver(new URL(Node), cap);
			// Puts an Implicit wait, Will wait for 10 seconds before throwing
			// exception
			driver.manage().timeouts().implicitlyWait(10, TimeUnit.SECONDS);

			// Launch website
			driver.navigate().to(URL);
			driver.manage().window().maximize();
		} else if (browser.equalsIgnoreCase("chrome")) {
			System.out.println(" Executing on CHROME");
			DesiredCapabilities cap = DesiredCapabilities.chrome();
			cap.setBrowserName("chrome");
			String Node = "http://192.168.1.3:5567/wd/hub";
			driver = new RemoteWebDriver(new URL(Node), cap);
			driver.manage().timeouts().implicitlyWait(10, TimeUnit.SECONDS);

			// Launch website
			driver.navigate().to(URL);
			driver.manage().window().maximize();
		} else if (browser.equalsIgnoreCase("ie")) {
			System.out.println(" Executing on IE");
			DesiredCapabilities cap = DesiredCapabilities.chrome();
			cap.setBrowserName("ie");
			String Node = "http://192.168.1.3:5568/wd/hub";
			driver = new RemoteWebDriver(new URL(Node), cap);
			driver.manage().timeouts().implicitlyWait(10, TimeUnit.SECONDS);

			// Launch website
			driver.navigate().to(URL);
			driver.manage().window().maximize();
		} else {
			throw new IllegalArgumentException("The Browser Type is Undefined");
		}
	}

	@Test
	public void calculatepercent() {
		// Click on Math Calculators
		driver.findElement(By.xpath("//a[contains(text(),'Math')]")).click();
		// Click on Percent Calculators
		driver.findElement(
				By.xpath("//a[contains(text(),'Percentage Calculator')]"))
				.click();
		// Enter value 17 in the first number of the percent Calculator
		driver.findElement(By.id("cpar1")).sendKeys("17");
		// Enter value 35 in the second number of the percent Calculator
		driver.findElement(By.id("cpar2")).sendKeys("35");

		// Click Calculate Button
		driver.findElement(
				By.xpath("(//input[contains(@value,'Calculate')])[1]")).click();
		// Get the Result Text based on its xpath
		String result = driver.findElement(
				By.xpath(".//*[@id='content']/p[2]/font/b")).getText();
		// Print a Log In message to the screen
		System.out.println(" The Result is " + result);
		if (result.equals("5.95")) {
			System.out.println(" The Result is Pass");
		} else {
			System.out.println(" The Result is Fail");
		}
	}

	@AfterTest
	public void closeBrowser() {
		// driver.quit();
	}
}
Step-2:
So, you just need to copy-paste the above into a Java file in the Eclipse IDE. In the next few steps, we’ll tell you how to add the <TestNG.xml> to your code and what to keep in this file.
We use this file to pass the browser parameter and to specify the test order. So, first of all, create an XML under the project folder in the Eclipse IDE.
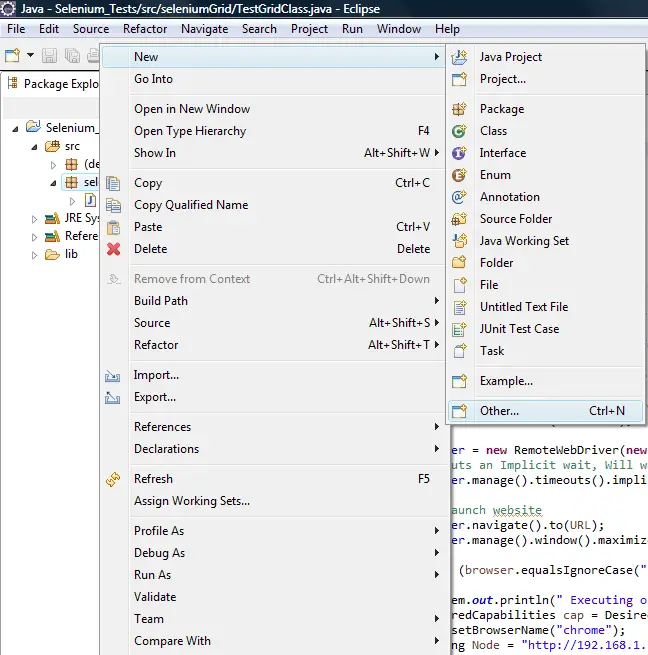
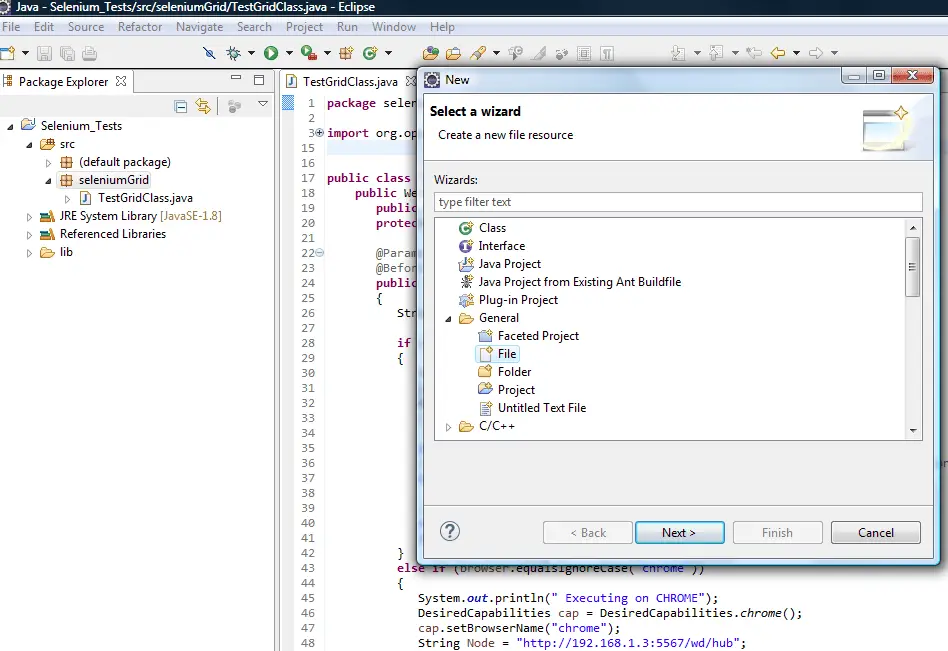
Step-3:
Select the <File> option from the <General> menu and press the <Next> button.
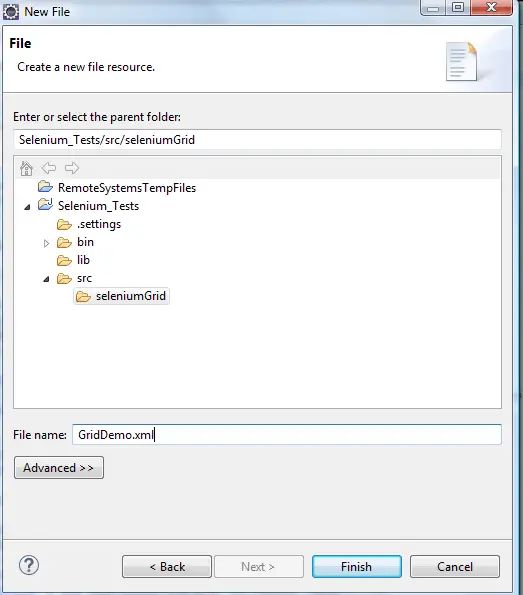
Step-4:
Enter the name of the file as <GridDemo.xml> and press the <Finish> button. By default, its name is <TestNG.xml>.
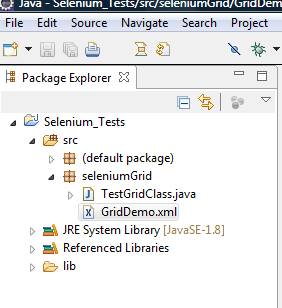
Step-5:
You can now see that file <GridDemo.xml> gets created under the project folder as shown below.
Step-6:
In this section, you can view the contents of the XML file. Please check that we’ve added three tests and put them in a suite. Also, we mentioned <parallel=”tests”>. So, all the tests could run in parallel.
<?xml version="1.0" encoding="UTF-8"?>
<!DOCTYPE suite SYSTEM "http://testng.org/testng-1.0.dtd">
<suite name="Suite" parallel="tests">

   <test name="FirefoxTest">
   <parameter name="browser" value="firefox" />
      <classes>
         <class name="seleniumGrid.TestGridClass" />
      </classes>
   </test>

   <test name="ChromeTest">
   <parameter name="browser" value="chrome" />
      <classes>
         <class name="seleniumGrid.TestGridClass" />
      </classes>
   </test>

   <test name="IETest">
   <parameter name="browser" value="ie" />
      <classes>
         <class name="seleniumGrid.TestGridClass" />
      </classes>
   </test>

</suite>
You’ve now completed the development part of the Selenium Grid Webdriver code. So, what remains is the execution of the tests on multiple browsers. Check out the second part to see the test execution.
2- Test Execution.
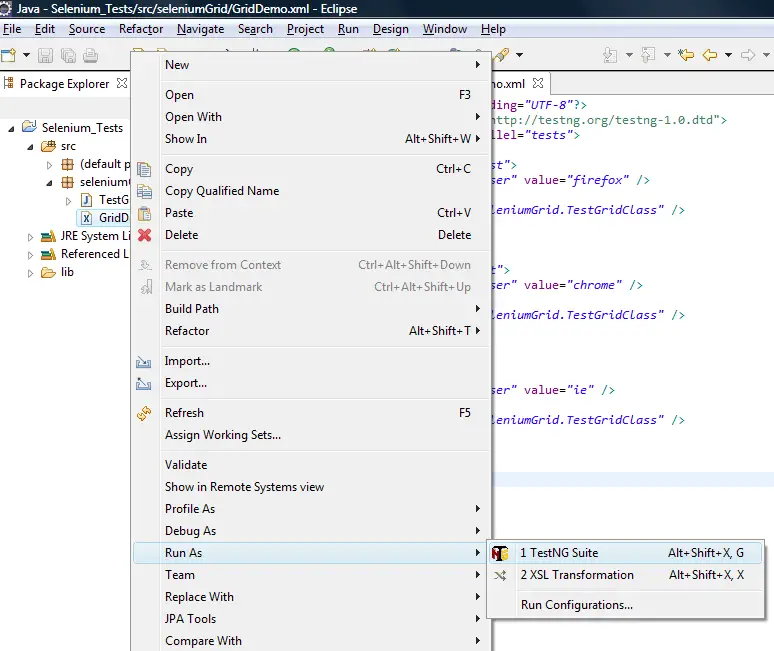
Step-1:
Select the created XML i.e. <GridDemo.xml>. Right-click and choose the <Run As >> TestNG Suite> option.
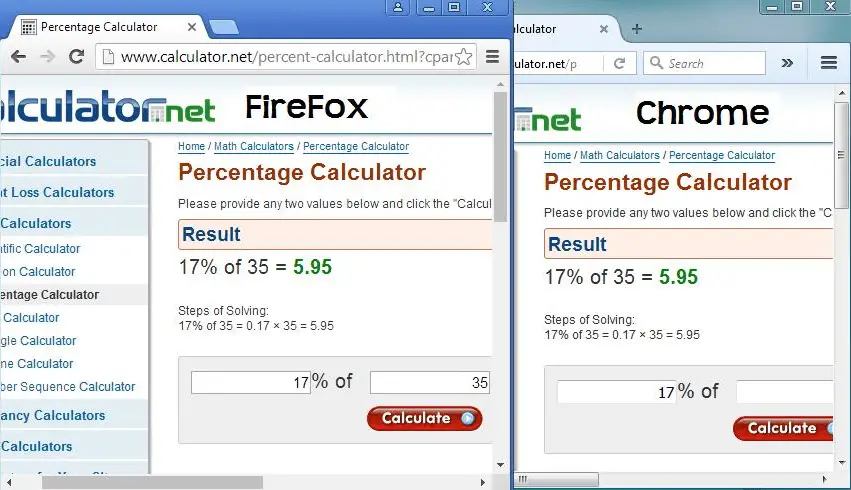
Step-2:
Now open the Node where we have launched all the browsers. You will see all of them running simultaneously.
Note: For setting up the hub node, please check our earlier post on download and use Selenium Grid to run multiple browsers.
3- Result Analysis.
Step-1:
After successfully completing the test execution, the result summary gets printed in the console as you can view from the below snapshot.

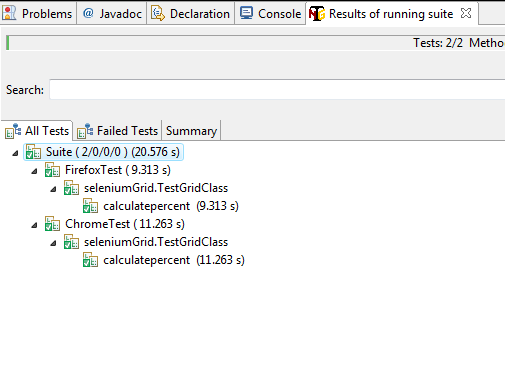
Step-2:
Next, to see the status of all tests, Navigate to the <Results of Running Suite> Tab. Here, TestNG displays the result summary in the following manner.
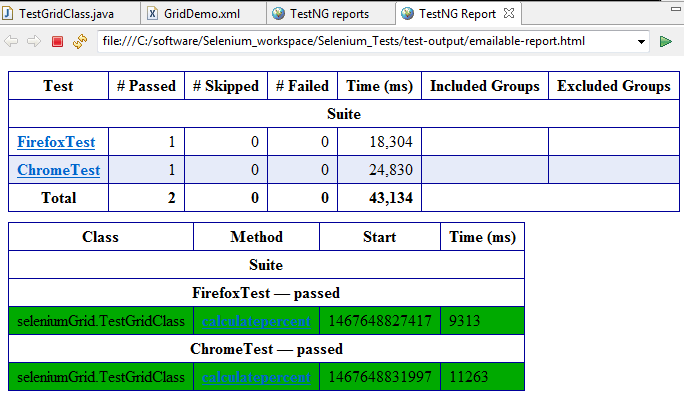
Step-3:
Finally, let’s check out the auto-generated <TestNG> report. With this, we’ll be able to see the test results in HTML format.
Footnote – Selenium Grid Webdriver Code Example
We hope the above tutorial will help you in using Selenium Grid in your environment. And you’ll be able to speed up the test execution by running tests in parallel using Selenium Grid. Also, if you decide to use Selenium for load testing, then please share your experience after you implement it.
Hope, you succeed in reaping the full benefits from reading our latest post on the Selenium Webdriver and Selenium Grid.
Thanks to you all for visiting. Please drop your feedback in the comment box section.
All the Best,
TechBeamers.