TestNG is an advanced test automation tool that has several benefits over the JUnit framework. Originally aimed at reducing unit testing efforts in Java development, it’s now widely used for test-driven development (TDD) by software testers. TestNG brings cool features such as annotations like DataProvider in TestNG, parallel execution, test case management, and effective reporting. If you use Eclipse IDE, you can install the TestNG plugin to simplify your testing process. In this post, we’ll show you how to install TestNG in Eclipse using three simple methods.
Setting up TestNG in Eclipse IDE
TestNG also has its own set of built-in assertions, referred to as TestNG Assertions. These assertions are used to validate conditions within TestNG test cases, similar to the standard Java assertions, but they provide additional benefits and flexibility for test verification. Above all, it has an excellent test report generation feature. If you haven’t already gone through it, check out our detailed tutorial on how to generate reports in Selenium.
Before you move to the next section, please make sure you have the right version of Eclipse software installed. In case, you are uncertain or don’t have the software then use the below link to download Eclipse.
Method#1: Install TestNG from Eclipse Marketplace
All the new Eclipse IDE versions are now coming up with the Eclipse marketplace plugin. It’s the easiest and quicker way to install any third-party plugin in Eclipse including the TestNG plugin. Eclipse Marketplace gives you a rich interface to search and install the plugins.
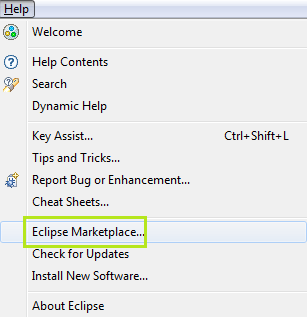
First Step
You can access this plugin from the help menu available on the main toolbar. Click on the “Eclipse Marketplace…” option listed under the help menu.
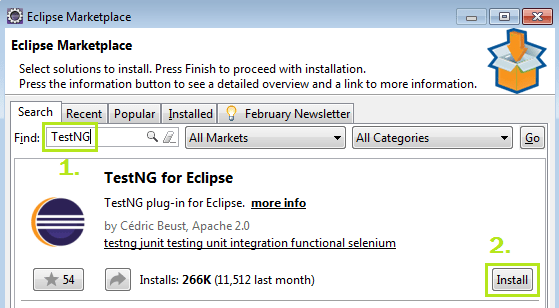
Second Step
In the “Find” input field, write “TestNG” and press enter to search. The search will land you the desired TestNG plugin listed in the result section. There you’ll see an “Install” button with every result that appears in the search. Press it to continue installing the TestNG for Eclipse.
You might think that when it’s so easy to install TestNG then what is the use of mentioning the old and lengthy ways to achieve the same? We are listing the legacy TestNG installation methods because there are people who still use the old Eclipse versions. Additionally, there are IT companies that work in a restricted network environment where an automatic TestNG installation is not possible.
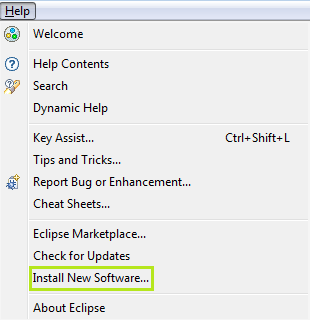
Method#2: Install TestNG Using Eclipse’s “Install New Software”
First Step
Open the Eclipse IDE, from the main menu bar, select the Help menu, and click on the “Install New Software…” option. It’ll launch an install popup window.
Second Step
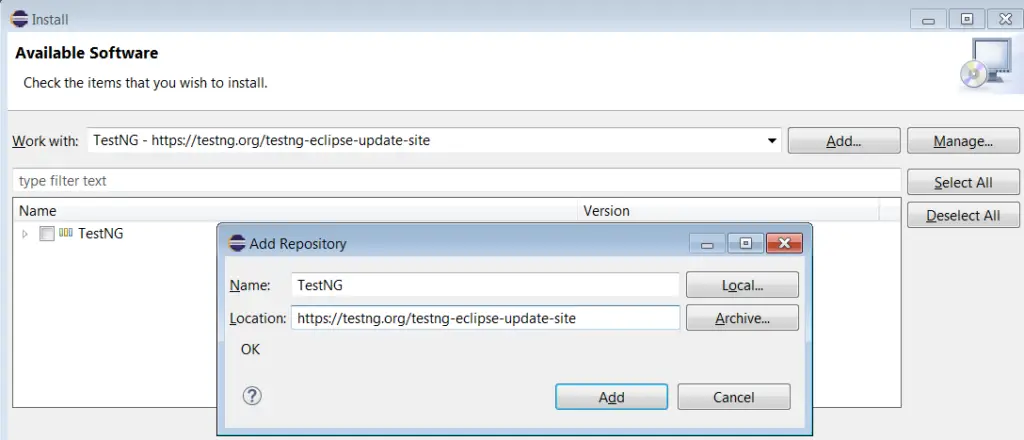
Fill in the update site link (https://testng.org/testng-eclipse-update-site) in the work field and click the Add button.
Add button action will open a small popup dialog asking for the name of a repository. Assign the value “TestNG” in the name field and press the OK button.
Third Step
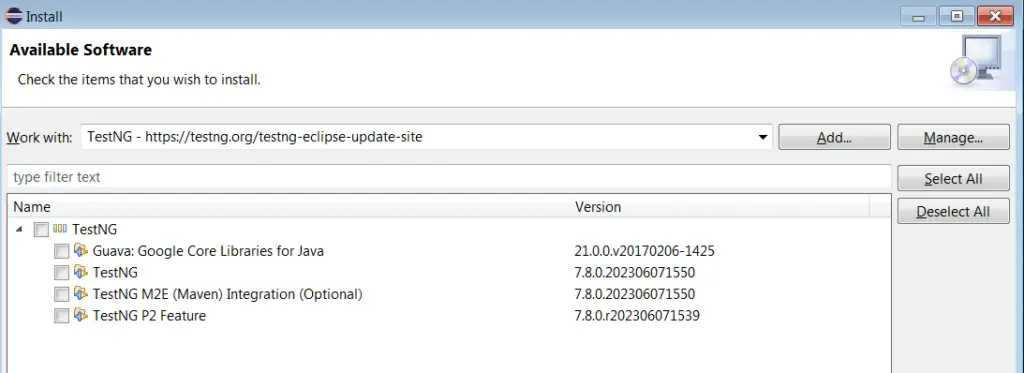
After pressing the OK button, Eclipse will query the above link and list the available version of the TestNG plugin.
Fourth Step
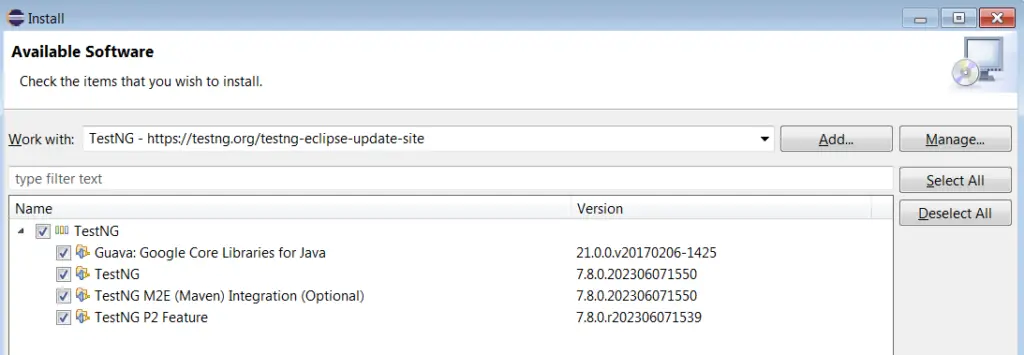
Now tick on the “TestNG” item displayed in the list and click on the “Next” button present at the bottom of the popup window.
Fifth Step
Soon after pressing the “Next” button, the plugin manager will check for the required components and dependencies.
If it detects any such requirement, you’ll need to install it first before going with the TestNG installation. However, you are unlikely to see any error/warning as in most cases it completes the TestNG installation without any issue.
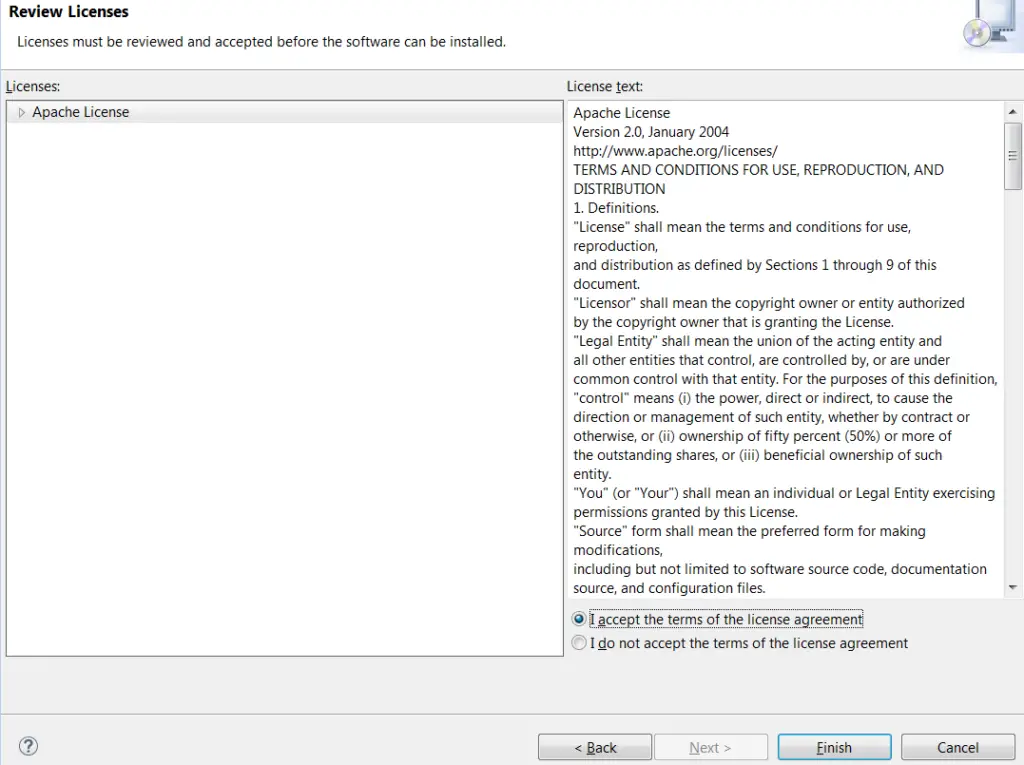
Next, in the sequence, you’ll see a license agreement dialog, just click on the “accept…” radio button. Then click on “Finish” to complete the TestNG installation process.
Sixth Step
In this step, you’ll see a security warning which you ignore by clicking the OK button. After this Eclipse will restart to complete the TestNG installation process.
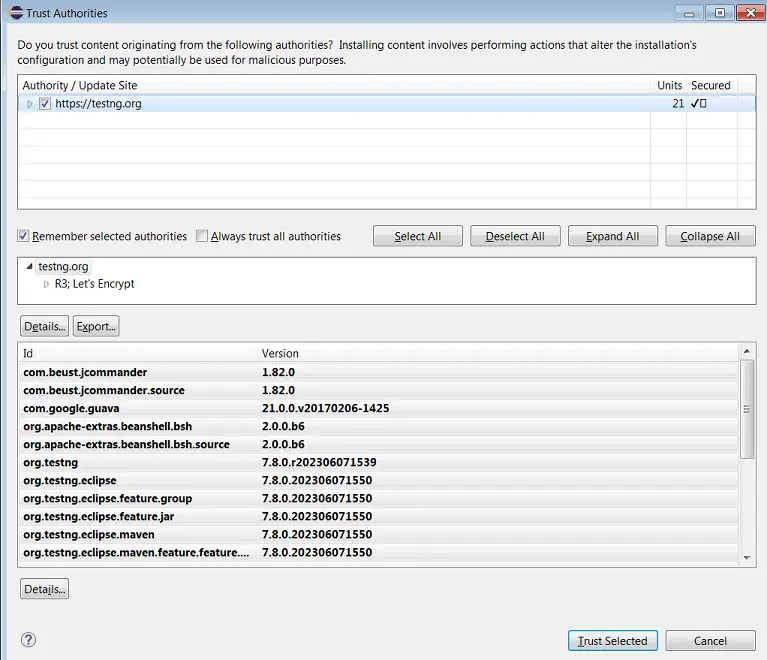
After this step, you may see another popup asking you to trust unsigned jars. To continue, check the option and proceed to finish installing TestNG.
Method#3: Install TestNG in Offline Mode
First Step
Firstly download the TestNG Jar files from the link given below. For illustration, we’ve provided the direct URL to download TestNG version 6.11. However, you can download any of the latest versions available on recent releases of the TestNG page.
Clicking on the above button will download the “site_assembly.zip” file for the TestNG version 6.11. This file contains two folders named “features” and “plugins“.
The features folder contains the following two files.
- org.testng.eclipse.maven.feature_6.11.0.201703011520.jar
- org.testng.eclipse_6.11.0.201703011520.jar
The plugins folder contains these two files.
- org.testng.eclipse.maven_6.11.0.201703011520.jar
- org.testng.eclipse_6.11.0.201703011520.jar
Second Step
- Go to the Eclipse installation directory and look for the
dropinsfolder there. - Create a folder inside the
dropinsfolder and name ittestng-eclipse-6.11.- The 6 is the major & 11 is the minor version of the TestNG plugin.
- Extract the “site_assembly.zip” file and copy its content i.e. the “features” and “plugins” folders to the newly created
testng-eclipse-6.11directory.
The Eclipse install directory would now look like this.
C:\Users\techbeamers\eclipse
  java-2023-06\
     dropins\
        testng-eclipse-6.11\
            features\
               org.testng.eclipse.maven.feature_6.11.0.201703011520.jar
               org.testng.eclipse_6.11.0.201703011520.jar
            plugins\
               org.testng.eclipse.maven_6.11.0.201703011520.jar
               org.testng.eclipse_6.11.0.201703011520.jar
Third Step
Last, but not least, you will need to restart or start the Eclipse to see the TestNG plugin getting loaded into the IDE. However, the process would be slightly slow as Eclipse will first time load the new plugin.
From Eclipse, by pressing CTRL+N, you can open the “New” wizard. It will load the list of all available module/project templates. By scrolling down in the list, you can make sure that it has the “TestNG” option.

Final Thoughts on Installing TestNG in Eclipse
Great, you learned 3 different methods to install TestNG in Eclipse IDE. Writing this tutorial would be worth it if it could help you with TestNG installation.
In our future posts, we’ll cover more about TestNG, its features, and integration with Selenium WebDriver for web UI test automation.
However, our site needs your support to remain free. We request you share this post on your social media if you gained some knowledge today. You may subscribe to our YouTube channel for more informative content.
Enjoy Testing,
TechBeamers


That’s great to hear that our tutorial was able to help.
Thanks for sharing.
Great!! , After a lot of frustration now found the perfect solution for TestNG as it was showing error while installing from marketplace